Monday, February 25, 2013

Wedding Inspiration

No no no, I am not getting married any time soon. But by the amount of wedding table settings or floral arrangements on my pinterest you might think otherwise. The truth is I just find weddings to be really magical and inspiring. The idea of wedding planning is something that really draws me and I think about it a lot. It's a celebration that really allows for the right mix of all of my favorite things: love, family, friends, dancing, food, drinks, good spirits, and the magic of saying vows which to me looks more like reciting a spell when it's done right.
This Big Sur wedding featured over on Once Wed has my wedding heart aflutter. It is such an intimate reflection of the couple, and I love how the bride describes the reception, "We wanted the feeling of the dinner to be more like an other worldly feast from a lost time - enchanted and somehow bewitched!" So good!


All photos here

Thursday, February 21, 2013

Dog Sleepover

I miss my furry friend. His nose, his ears, his high pitched whine. I miss having him around all the time and he misses me too! So Joey and I invited Marley over for a sleepover at our new house and it was such a blast that we are going to make it a weekly thing. Here are a few of the highlights: 


He loved our HUGE yard so much that he spent all of his time either running around it like a maniac or crying at the door to be let back out. Not pictured: we attached Joey's bike light to his collar so we wouldn't lose him into the dark abyss, and it made us laugh to see this blinking red light darting around the yard. 


We did lots of ear scratching and gazing into each others' eyes. 


No sleepover is complete without a little gossip. Marley mostly listens. 


Such a sweet face. He's like a deer and a fox at the same time. 
P.S. Sorry for the grainy photos! My iPhone + our dark little hobbit house make for some difficult lighting. 

Monday, February 11, 2013

Little House Living: the living room


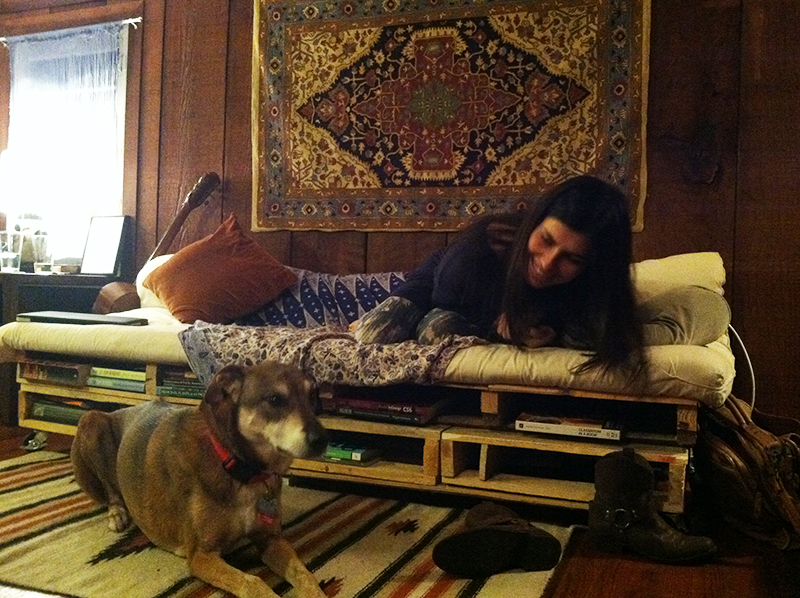
Decorating a tiny space and making it feel cozy is not really a challenge, it's the staying organized part that is hard. With two lives worth of stuff to fit into one small space, I knew we would have to get creative. Having a piece of furniture or area of the house that only serves one purpose is for mansion dwellers. We needed more uses for less things. My favorite piece of multi-functional furniture we have is our couch. Joey built it for us out of shipping palettes and a futon mattress and we love it! Bonus: we use the slots underneath as a book shelf. And that little table to the left of it is a brass-topped beauty that I found at a garage sale. Now it holds a lamp, some candles, fairy cards, gemstones, and some coasters while also hiding the baskets below it. Which brings me to baskets: the best and most attractive way to hide your belongings in a small space. These ones hold my weaving materials and other fiber bits, our terra cotta and stone clay collection, and extra boxes of tissue. The ones under our bed hold my makeup (the bathroom is a story for a different day) and all my extra purses/scarves/tapestries, and a bunch of Joey's things. I always find good ones at Ikea or Cost Plus World Market.

And now if you will direct your attention to the area just above the side table... this weekend I hand-dyed curtains! Two out of three of them were a success (not bad for my first try) and this little gauzy one is my favorite. I went for an ombre effect using a deep blue and then I folded over the top leaving the rough edge exposed and made some little golden stitches. The dying was a mess and not as easy as I had hoped, but I might try again.  


Friday, February 8, 2013

Love Note to a Pal

During a recent visit to Cost Plus World Market I came across these little mints that my friends and I were obsessed with while we were in Amsterdam during our Spanish year abroad. I grabbed a few boxes and planned on mailing them, and what better time than now in the form of a sweet little valentine?!
This little DIY is great for any small boxed candy and the double-wrap job makes it totally mail-able, so  if your pals live far and wide just slap a stamp on it! 


Begin by folding your envelope from the bottom so that it is the same width as your candy box. This will make it so that the card can be wrapped inside of the package in case you plan on mailing it. Secure the folded end with tape, leaving the flap free. Personalize your tag and tuck it into the envelope. Add confetti hearts. 

Secure the envelope with some fancy tape to keep all that confetti inside, and then decorate the front with a little something too. Now wrap your candy box in a layer of tissue. I like the mint color for some contrast. 

Now place the card on top of the box and wrap the pair in the outer wrapping. Secure the ends with pretty tape and then add a twine bow.

If you are sending it through the mail, now is the time to adhere your address label and stamps. I decided to place the whole box in a glassine envelope and adhere the addresses to that so that my bow would be tucked inside. Otherwise, just skip the bow because it might get caught in the robotic arm of the postal center. Part of the fun is seeing the surprise and delight of the postperson when they ship this festive little love note for you. Imagine how boring white envelopes get 8 hours a day! 


Wednesday, February 6, 2013

Pre-Spring Florals

It's still winter but a little visit to my pinterest and all this floral goodness has me ready for spring! So I made a little mood board with a few of my favorites. Happy Wednesday!


Friday, February 1, 2013

Little Love Gifts

Oh hey, February! How nice of you to finally join us. Obviously we all know that Valentine's Day is right around the corner and in honor of this month of looooove I thought I'd start a little series of DIY posts centered around small tokens and gestures of love and appreciation to spread those lovin' feelings all around. 
This one is for the birds.
Whether you craft a lot or just a little bit, chances are you end up with scraps. Scraps of paper, yarn, thread... my desk (and the floor around it, and the bottom of my socks) is often covered in little bits and pieces of this or that and I like to gather it up from time to time and donate it to the architectural pursuits of my feathered friends. Come nesting season those little threads and yarns will make the perfect addition to a bird nest near you! And when lovingly packaged this makes an adorable little gift for a bird-loving friend. 
As far as DIY's go, this one is so easy. Just gather your little scraps, a small vessel of some kind (I used a tiny envelope), and some fancy pens or stamps. I labeled the outside of the envelope "nesting materials" and noted that it is intended "for bird friends." Then, I added a simple branch stamp that I carved by hand. Now just add your nesting bits and you are ready to give a gift that will keep on giving! All the recipient needs to do is place the nesting materials outside and wait for the birds to make their selections.